 BerryCade
 9. VPN
9.1 Site-to-site IPsec wizard (Assistente IPsec)
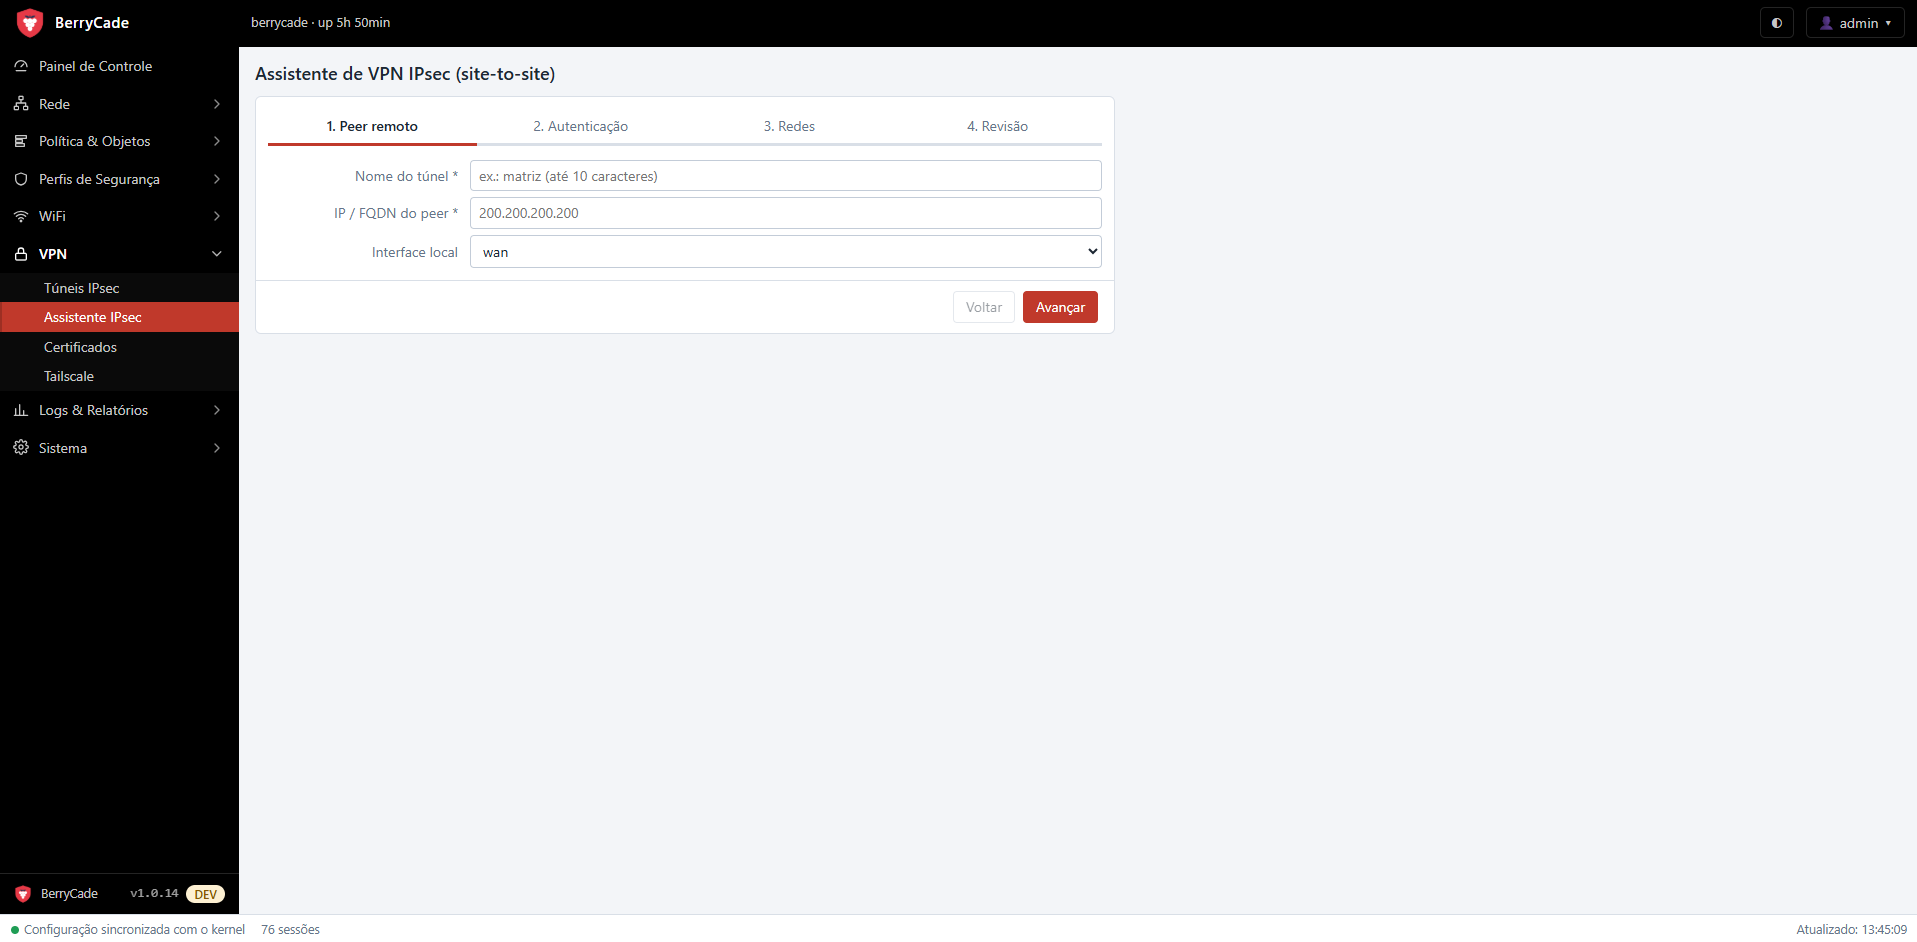
Figure 13 — IPsec Wizard screen (VPN › Assistente IPsec)
| Step | What to enter |
|---|---|
| 1. Peer remoto (Remote peer) | Tunnel name (up to 10 characters), IP or FQDN of the other side, and the local interface (usually wan). |
| 2. Autenticação (Authentication) | Chave pré-compartilhada (PSK) (Pre-shared key) or Certificado (Certificate: local certificate and the peer's CA). |
| 3. Redes (Networks) | Local and remote subnets, the tunnel zone, and whether the outbound and return policies should be created automatically. |
| 4. Revisão (Review) | Check the summary and create the tunnel. “Editar parâmetros de criptografia” (Edit encryption parameters) lets you adjust phase 1/phase 2 before creating it. |
9.2 IPsec tunnels (Túneis IPsec)
Lists the tunnels with remote gateway, state and traffic, and lets you Subir túnel (Bring tunnel up) and Derrubar túnel (Bring tunnel down). Modo avançado (Advanced mode) holds the encryption parameters:
| Parameter | Description |
|---|---|
| Versão IKE (IKE version) | IKEv2 (recommended) or IKEv1. |
| Propostas fase 1 / fase 2 (Phase 1 / phase 2 proposals) | IKE and ESP encryption algorithms; they must match the other side. |
| Vida da fase 1 / fase 2 (Phase 1 / phase 2 lifetime) | Key renewal time, in seconds. |
| Dead Peer Detection | Interval for detecting that the other side is down. |
| Iniciar túnel (Start tunnel) | Always (active), on demand (when there is traffic), or wait for the peer. |
| NAT-T | Force UDP encapsulation (useful behind NAT). |
The IPsec service runs only when at least one tunnel is enabled.
9.3 Certificates (Certificados)
Gerar certificado local (Generate local certificate) creates (once) the BerryCade local CA and issues an ECDSA certificate signed by it, with name, CN/ID and validity. Importar CA do peer (Import peer CA) adds the other side's CA for certificate authentication.
9.4 Tailscale
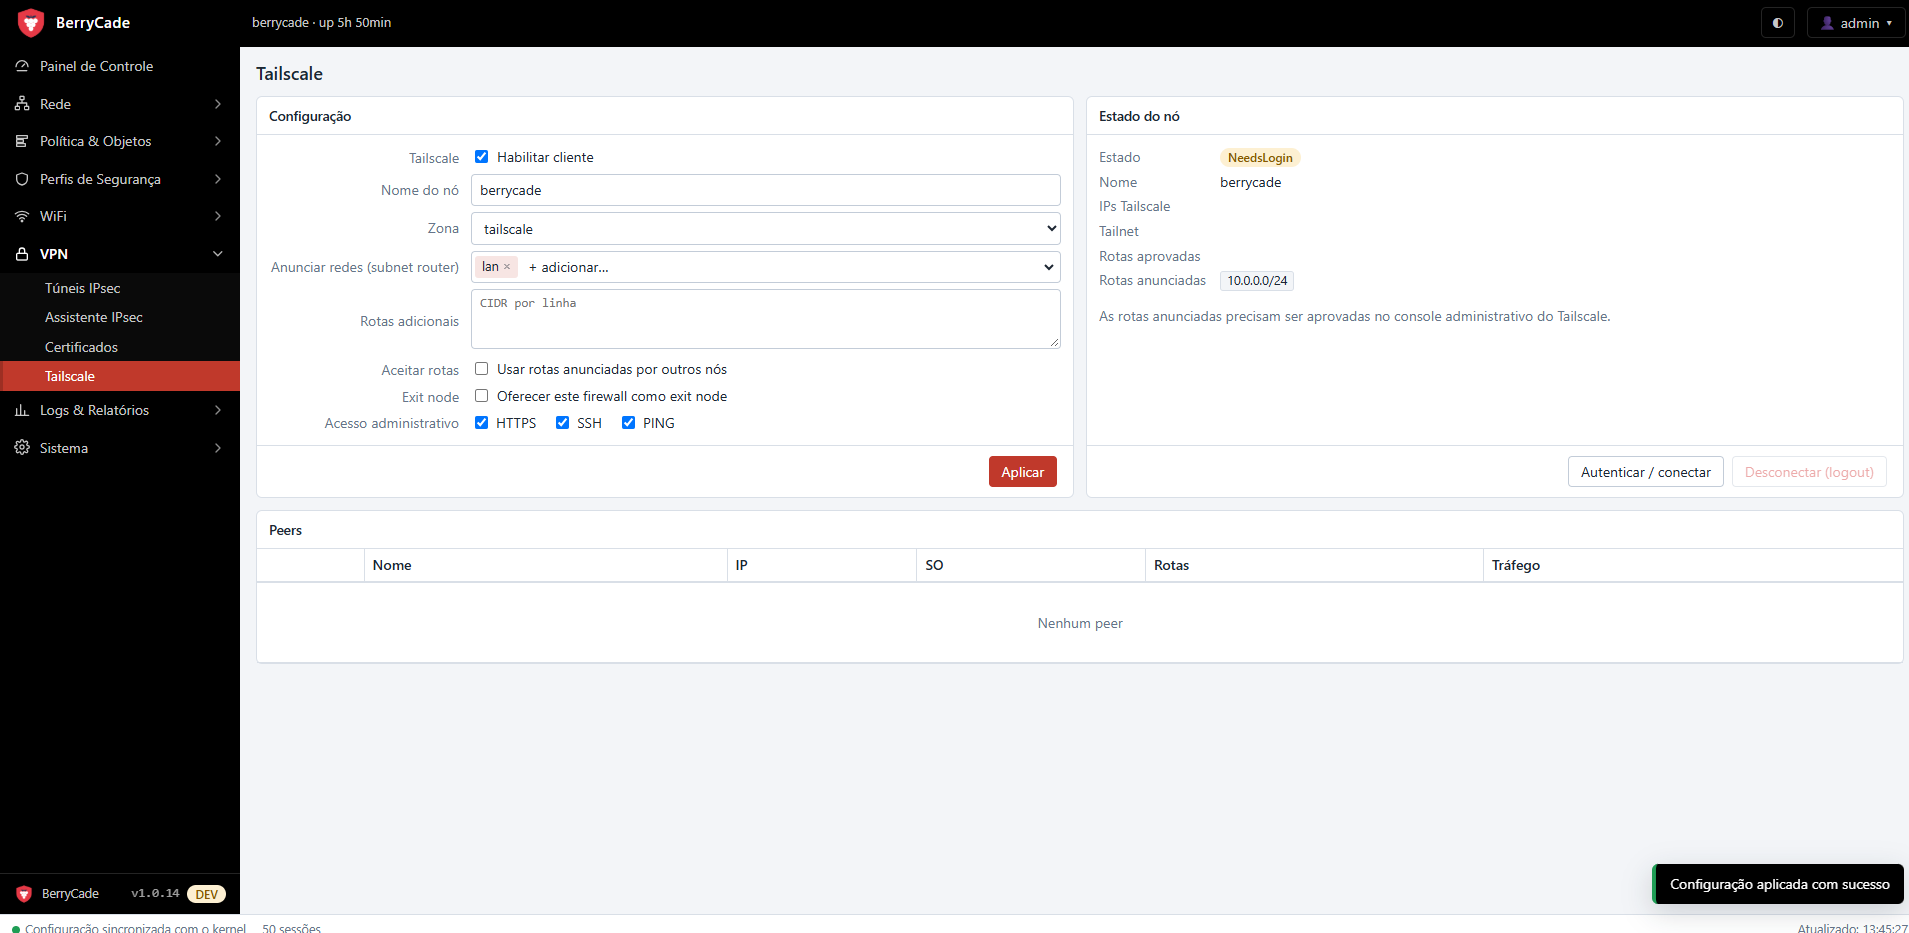
Figure 14 — Tailscale screen (VPN › Tailscale)
| Field | Description |
|---|---|
| Habilitar cliente (Enable client) | Turns on Tailscale on the firewall. |
| Nome do nó / Zona (Node name / Zone) | How the firewall appears in your tailnet, and the zone through which Tailscale traffic enters the policies. |
| Anunciar redes (subnet router) (Advertise networks) | Local networks that other devices in the tailnet can reach through the firewall. |
| Rotas adicionais (Additional routes) | Other networks (CIDR) to advertise. |
| Aceitar rotas (Accept routes) | Use the routes advertised by other nodes in the tailnet. |
| Exit node | Offer the firewall as an internet exit for the tailnet. |
| Acesso administrativo (Administrative access) | HTTPS, SSH and PING to the firewall over the tailnet. |
- Configure the settings and click Aplicar (Apply).
- Click Autenticar / conectar (Authenticate / connect) and log in with the link shown (or enter an auth key).
- In the Tailscale admin console, approve the advertised routes — until then they show as pending.